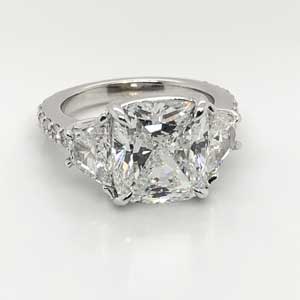
Custom Design Your Own Engagement Ring
Custom designing an engagement ring is very exciting and fun. Take a design you like and turn into a ring that you will love. The process of custom designing an engagement ring takes about three weeks to complete. From concept to finished product, you are involved in a process that few ever see.
Step 1: Laying the Ground Work. From Idea to CAD
You and the designer will discuss the design you want to create. When you decide on the center stone, you and the designer will examine how the design should be adjusted for the size and shape of the center stone. Just because a design may have a square stone in the center, does not mean it cannot be adjusted for an oval.
From there it goes to the CAD designer or Computer Aided Design designer. The CAD designer will take your finger size, the shape of the center stone you chose and the design that you like and create an all new original design.
Step 2: Customer Approval
The CAD designer has completed his interpretation of your vision, and you are able to see it for the first time. Emailed to you are 4-5 different views of the design. This should allow you to see every part of the ring. Do you have any changes that need to be made? Do you approve of this design? If you want to make any changes, you will do it now. Once you approve, we can move on to the production of your ring.
Step 3: Wax and Casting
With the approved design decided, the CAD designer will create a wax resin version of your ring on a 3D printer. The 3D printer may take 8 hours to make the design come to life. This is the first time a likeness of your design can be held and admired. From here, the wax resin is placed in to cylinder and is encased in plaster. Once the plaster hardness and your design is trapped inside, it is placed into an oven set to 1350 degrees.
The wax resign vaporizes and all is left is a cavity in the exact shape of your design. The cylinder with your design is placed on to a machine that will draw air downward while the jeweler will pour in your metal of choice. At 1948 degrees, the jeweler allows the liquid gold to pour in while a torch is keeping it in its liquid state. The jeweler will make sure that no air is left as the cast of your design is created.
Step 4: Before and after with the Jeweler
While the cast is being made by the jeweler, an associate of Aura Diamonds is sorting the diamonds that go into the design by size, color and clarity. Each diamond is hand selected according to the CAD designer's map of the approved design. Then, the jeweler meticulously sets each diamond under 30 x magnifications. After setting each stone and polishing the metal to a mirror finish, what was once an idea in your mind becomes a ring for finger and a symbol that will last generations.
Step 5: Quality Control
Quality control started the moment you and the designer created a design and entered the measurements to be designed by the CAD designer. The CAD designer confirms the sizes. And the jeweler will only use the diamonds that fit perfectly in to the design. Once completed, your ring is under the Aura Diamonds Lifetime Guarantee where each diamond, up to 0.10ct, will be replaced if it were to have a lost stone.
Final Step 6: Customer Receives Final Product
An unveiling like no other, the black lacquered box is opened and all that hard work explodes through the sparkle of the diamonds set in her ring. Of course it is beautiful, but one more thing has to happen. When it comes to the engagement ring, we at Aura Diamonds have to wait patiently for you to give the ring. We are honored that you have allowed us to be part of meaningful and intimate part of your life.


